-
[Ubuntu] Ubuntu 18.04에 Nginx, PHP, MariaDB, phpmyadmin 설치하기백엔드/Linux(Ubuntu) 2019. 6. 8. 14:47728x90
Ubuntu 22.04 LTS는 아래의 방법으로 진행한다.
https://syudal.tistory.com/entry/Ubuntu-Nginx-PHP-연동하기
https://syudal.tistory.com/entry/Ubuntu-Nginx-PHPMyAdmin-설치하기
웹 서버를 구축하는 방법에는 크게 Apache와 Nginx를 사용한다.
이번 게시글에서는 Nginx를 이용하여 웹 서버를 구축하고자 한다.
apt-get 업데이트
apt-get update
apt-get upgrade
Nginx
Nginx 설치
$ apt-get install nginx
방화벽 규칙 추가
$ ufw allow 'Nginx Full'
127.0.0.1로 접속하여 아래와 같이 나오면 성공!

PHP
php 설치
$ apt-get install php-fpm
php 설정 위치 : etc/nginx/sites-available/default
$ vim default
#location ~ \.php$ {
# include snippets/fastcgi-php.conf;
#
# # With php-fpm (or other unix sockets):
# fastcgi_pass unix:/var/run/php/php7.0-fpm.sock;
# # With php-cgi (or other tcp sockets):
# fastcgi_pass 127.0.0.1:9000;
#}
↓
location ~ \.php$ {
include snippets/fastcgi-php.conf;
#
# # With php-fpm (or other unix sockets):
fastcgi_pass unix:/var/run/php/php7.0-fpm.sock;
# # With php-cgi (or other tcp sockets):
# fastcgi_pass 127.0.0.1:9000;
}
php index.html 설정
index index.html index.htm index.nginx-debian.html;
↓
index index.html index.htm index.nginx-debian.html index.php;
nginx 재시작
$ systemctl reload nginx
테스트
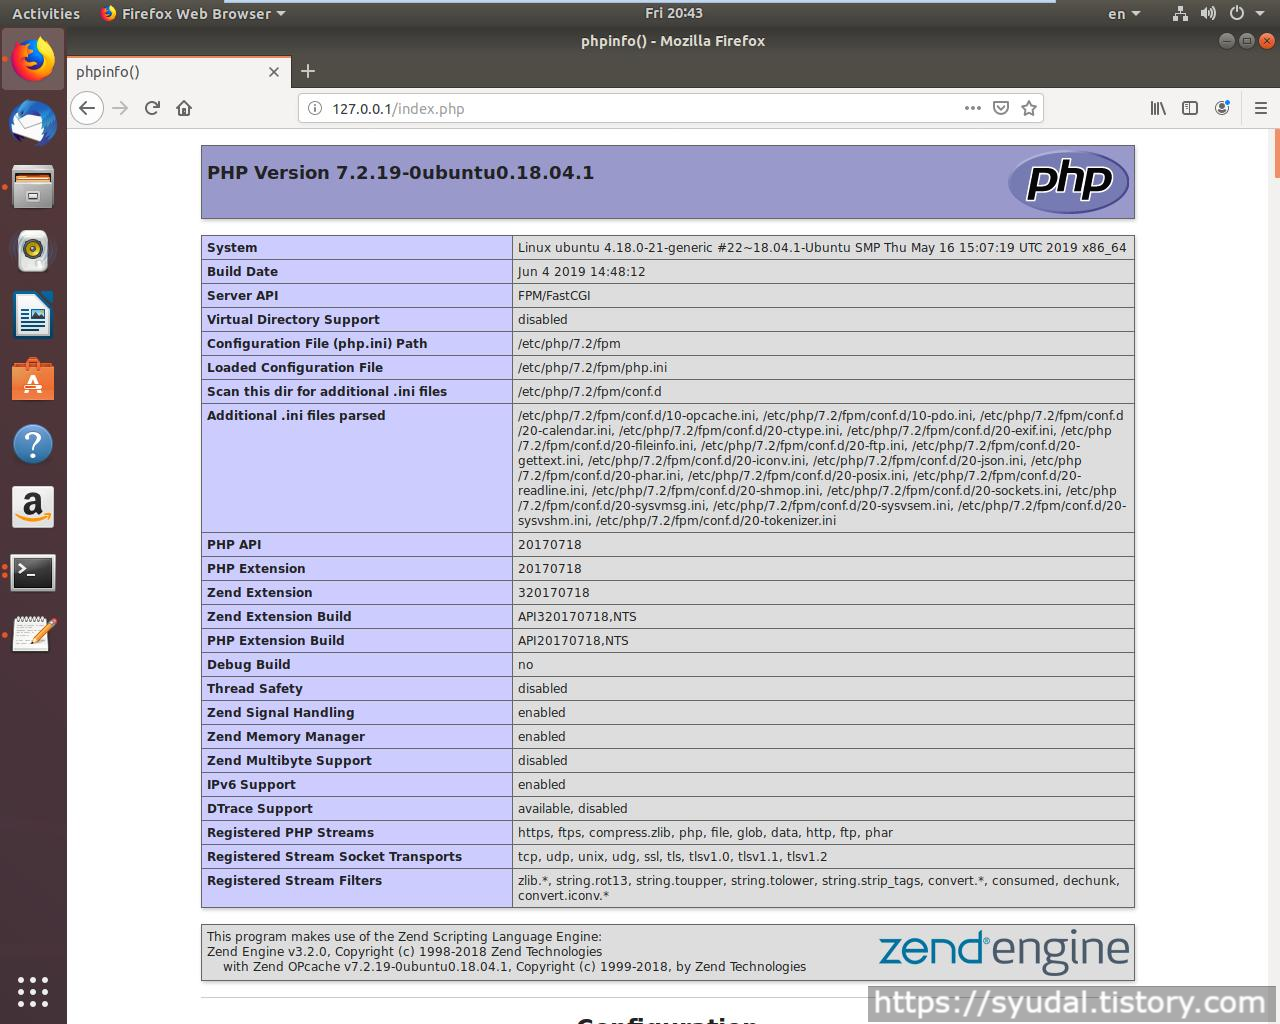
/var/www/html/ 경로에 index.php를 만들고 아래와 같이 입력후 저장
<?php phpinfo(); ?>
127.0.0.1/index.php로 접속하여 아래와 같이 출력되면 성공!
MariaDB
MariaDB, php-mysql 설치
$ apt-get install mariadb-server php-mysql
mysql 설정
$ mysql_secure_installation
Enter current password for root (enter for none): → 엔터
Set root password? [Y/n] → Y 이후 사용할 암호 입력
Remove anonymous users? [Y/n] → Y
Disallow root login remotely? [Y/n] → N
Remove test database and access to it? [Y/n] → Y
Reload privilege tables now? [Y/n] → Y
mysql root계정 접속
$ mysql -u root -p
use mysql;
update user set plugin='' where user='root';
flush privileges;
quit;
phpmyadmin
nginx에서는 $ apt-get install phpmyadmin을 지원하지 않는다.
phpMyAdmin
Your download should start soon, if not please click here. Please verify the downloaded file Please take additional steps to verify that the file you have downloaded is not corrupted, you can verify it using the following methods: phpMyAdmin needs your con
www.phpmyadmin.net
사이트에서 다운로드 받아 mv명령어를 이용하여 /var/www/html/phpmyadmin/으로 이동 시킨다.
파일 이동
$ mv php압축폴더 /var/www/html/phpmyadmin/
mbstring + curl 설치
$ apt-get install php-mbstring
$ apt-get install php-curl
접속
id : root
pw : 위에서 입력했던 암호
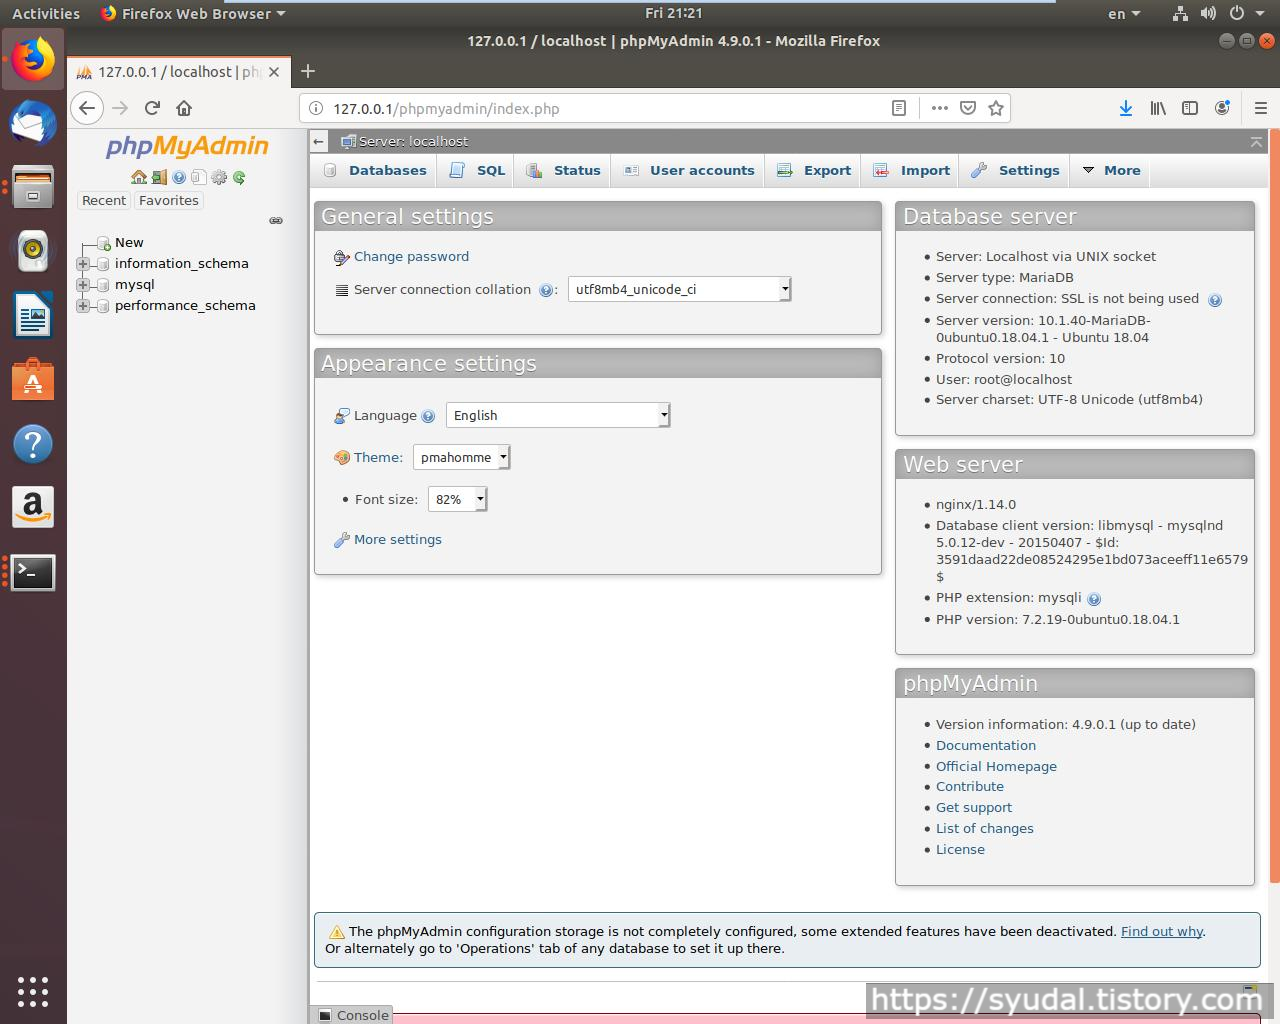
127.0.0.1/phpmyadmin/index.php로 접속하여 아래와 같이 표시되면 성공!
 728x90
'백엔드 > Linux(Ubuntu)' 카테고리의 다른 글
[Ubuntu] du로 하위 디렉토리의 용량 정렬해서 보기 (0) 2023.02.01 [Ubuntu, Nginx] 리버스 프록시 적용하기 (0) 2022.03.21 [Ubuntu, Nginx] Let's Encrypt로 https 적용하기 (0) 2022.03.10 [Ubuntu][vsftpd] 웹 서버에서 사용할 FTP 설치하기 (0) 2020.04.30 [Ubuntu] 우분투 한글 가상 키보드 (3) 2019.02.02 댓글